Theme Installation
Via WordPress
- Download the theme from the email. After the purchase of the theme, you will get an email where you can get the download link.
- Log in to your site and go to the Appearance > themes > add new > upload and upload the ZIP file and click on install and then activate.
- Enter the license key now. You can get the license key in the email.
Activating License
After purchasing the theme, don’t forget to activate the license for regular updates and supports.
After the theme gets installed and activated, you will get the place to enter the theme license.

Import Demo
Download the Demo Data from here. Click here to download.
- Extract the ZIP file and you will get an XML file.
- Go to Tools > Import
- Install WordPress at the button and upload the XML file
- Click on Import.
Note: If your site has genuine content, we don’t recommend you to use the demo data.
Child Theme of Haami Pro
Do you want to customize Haami Pro and looking for a child version? Click here to Download haami pro-child.
Why my Images are not in Actual like the demo?
Well, every theme has its own size of images used. If you are using this theme for your existing site, you need to regenerate the size of the image.

- Go to Admin Dashboard
- From plugins click on Add New
- Search Regenerate Thumbnails Plugins and Install it
- From tools go to Regenerate Thumbnails and click on Regenerate Thumbnails.
Recommended Image Size
The size for the slider and other places should be 1170 width 574 height minimum. If you are using the images smaller than this size, the image will not look good.
How to create a post?
To create a post on your site, it’s easy. Follow the below-listed methods.
- Go to Administration Panels
- Go to Posts and Click on Add New
- Give the title of the post and add the content
- Set the featured image for the post from the right corner.
- Set that post in the Category.
- Click on Publish Button.
- Add more posts like the above methods.
How to make a Page?
To create a page on your site, it’s easy. Follow the below-listed methods.
- Go to Administration Panels
- Go to Page and Click on Add New
- Give the title of the page and add the content
- Set the featured image for the post from the right corner.
- Click on Publish Button.
- Add more pages of the above methods.
How to add categories?
To create categories, follow the below steps.

- Go to Administration Panels
- Go to Posts > Categories
- Give the title of the category
- Click on Save
- The added category will appear on the Add Post Page.
A Trip to theme customizer – Settings
Site Title, Tagline & Logo
- Go to Appearance > Customize > Site Identity
- Click on Select Logo
- Select the logo.
- If the preview is fine, click on Save & Publish to save the changes.
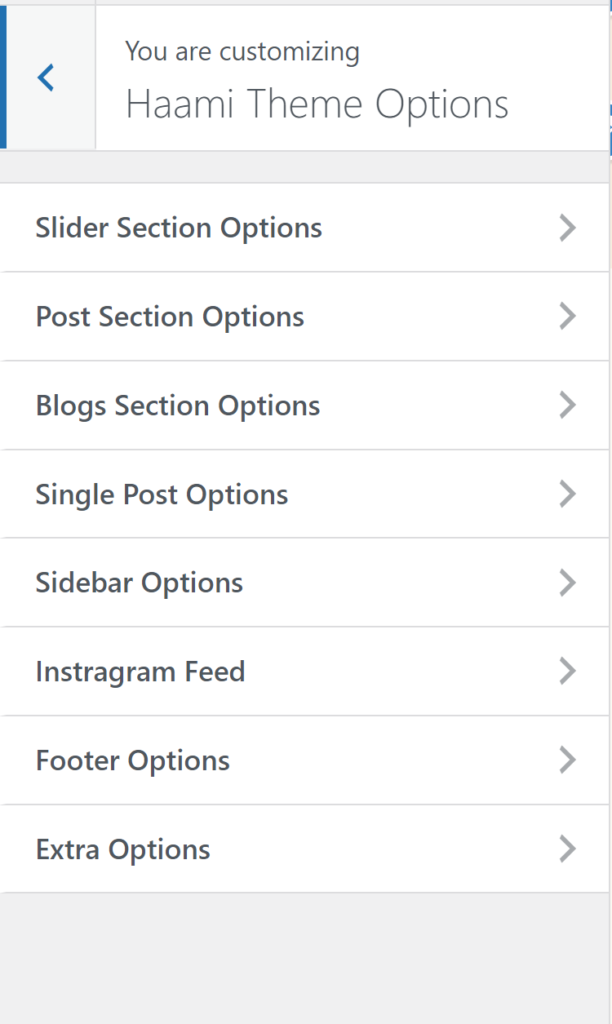
Theme Options

Slider Section
Go to Appearance > Customize > Haami Theme Options > Slider Section Options
Post Section Option
The section below the slider.
Go to Appearance > Customize > Haami Theme Options > Post Section Options
Blog and Archive Page Option
The section below the post.
Go to Appearance > Customize > Haami Theme Options > Blogs Section Options
Single Page Options
Go to Appearance > Customize > Haami Theme Options >Single Post Options
Sidebar Options
Go to Appearance > Customize > Haami Theme Options >Sidebar Options
Instagram Feed
Go to Appearance > Customize > Haami Theme Options > Instagram Options
Footer Options(Copyright)
Go to Appearance > Customize > Haami Theme Options >Footer Options
Breadcrumb Options(SEO)
Go to Appearance > Customize > Haami Theme Options >Breadcrumb Options